Faxes can be sent and viewed via this site. Any member of staff can send a fax but only users with appropriate permissions can view a fax history of all faxes sent and received through this system. Normal users can view their own fax history only.
Sending faxes
To send a fax, select the Send a Fax option from the menu.

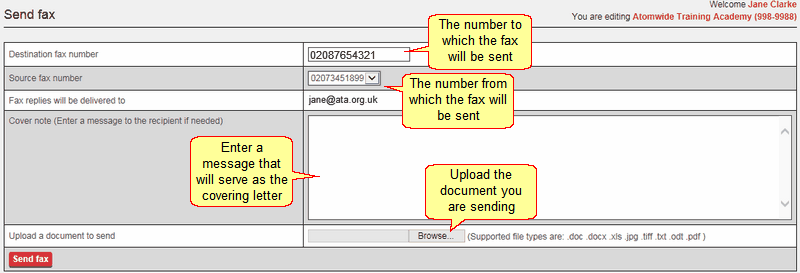
Use the interface provided to send a fax.
Destination number: enter the number to which you want to send the fax
Source fax number: this shows a dropdown menu that may contain only one number. If it contains several number (i.e. all the fax numbers belonging to the school) select the correct or relevant one each time you send a fax.
Cover note: the text box allows you to enter a message to the recipient that will serve as the first page of the text. If you use this, you will not need to include a cover letter as part of your uploaded document.
Upload a document to send: Upload the document from your machine or network. It is also possible to send a fax with just the cover note and without uploading a document.
Click Send fax to start sending.
Viewing received and sent faxes
It is possible to see a history of faxes sent and received via the Fax history page.
When the service is set up, the fax number of the school will be associated with an email address belonging to the school. Any faxes received will then go directly to the email address provided.
If the email has been lost or needs to be viewed by another person who does not have access to the fax mailbox but does have the fax-related permissions in the VoIP site it can be found in Received tab of the Fax history section.
To find the fax required, you can search any of the fields. Fields which do not offer menus will offer suggestions as soon as you begin typing.
When you have found the document you require click View fax.
Sent faxes can be found in the same way.

Select the tab you require in order to view either sent or received faxes.