Phones purchased by a school will already be registered within the Cisco Call Manager and can be used straight away.
However, all phones have features which can be configured by the school's System Administrator.
Settings on individual phones can be configured via the Phone Administration tab.
There are four different service levels available and each phone can only be configured with features available for the service level selected for that phone. The higher the service level, the more features the phone will have and therefore more configuration options will be available with higher service level phones.
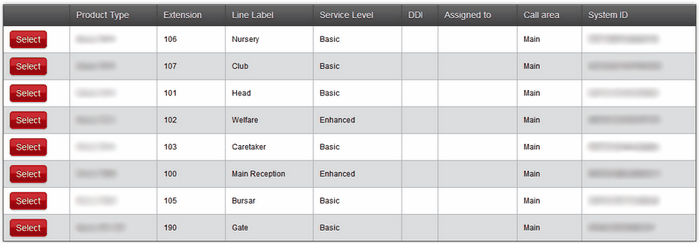
All the phones will be listed and each one can be configured individually.
The list will show the following columns:
Product type: this is the phone model and will be found on the handset
Extension: the internal number for the phone
Line label: this is the name created to identify where the phone will ring
Service level: this states which service level has been purchased for the phone
DDI: stands for "direct dial-in" and refers to an external number from which the phone can be reached. Phones without a DDI can only be reached as an internal extension.
Assigned to: it is possible to assign a phone to a person's USO account. This would enable that person, as the "owner" of the phone, to configure their own settings instead of having to rely on the system administrator. Both the person to whom the phone is assigned and the system administrator would have the same ability to configure that phone.
Call area: it is possible to specify calling restrictions for each phone so that calls can only be made internally, externally with restrictions, externally without restrictions, etc.
System ID: this code is relevant only to Wavenet in case troubleshooting is required.
Click Select next to the phone you wish to configure.

Once a phone has been selected, a pop-up will open. This can be used to configure the phone.
See next: